
Merchandise Retrospective
In November of 2015, I made some merchandise. Rather than selling it through an intermediary company, however, I decided to crowdfund, mass-produce, and ship it myself.
My theory going into the merchandise was that, by producing a bunch of it at once and shipping it myself, I could push the revenue beyond what a creator would get from using a merchandising company. Like, a single T-shirt sold off Redbubble might make $2 of revenue, while an equally-priced T-shirt packed and shipped by the artist would make $15. If I could prove this method viable for solo creators, I realized, it could vastly increase the number of artists able to support themselves off their work. Someone’s $4000/year off Redbubble could be a livable $30,000 salary! So, I delved in, and honestly the results I found were at least somewhat promising – moreso if I had better known what I was doing.
Something I discovered going into this was that there are very few resources out there for content creators looking to mass-produce their own physical goods. There’s a lot of literature for producers who are trying to find an audience for their goods, but not so much for people who have an audience and are trying to figure out how to make and sell things (to most businessmen, the very idea of that probably sounds ridiculous). My goal with this page to fill that gap a little, talking about the things I tried, what worked and didn’t, and how to avoid the large pitfalls that cost me thousands of dollars I really didn’t have to pay. While I am by no means an expert in this, my hope is that, by learning from my experiences, you can execute similar endeavors in less time and with greater profit.
Just bear in mind: this page isn’t about how to get rich or anything like that. You’re never going to get rich shipping T-shirts out of your own home, simply because a single person can only ship so many T-shirts a day. Rather, my goal with this page is to save as many amazing writers, artists, and game designers as possible from having to work a full-time job at Wal*Mart. Essentially: I want to describe my observations on how to make maximum revenue from the relatively small niche audiences so many creators hold.
So, let’s delve right the fuck in. And let’s make all the illustrations nonsensically and gratuitously naked, so you keep reading out of morbid curiosity.
The first question a lot of people would probably ask is “why do merchandise? Why not run ads, or take donations, or offer something like art commissions?” The answer is pretty simple:
Some people want merchandise.
I mean, yeah, some people will just want to give you a straight donation. Some people will want you to create a custom picture to their specifications. But, there is a population out there who will want physical products. Heck, there’s a population out there who didn’t even know they wanted to give you money, but a sufficiently cool piece of merch will win them over (the only money I’ve ever given other webcomic artists was for Rich Burlew’s tie-in books, Randall Munroe’s Thing Explainer, and Veronica Vera’s plushies). Even if you accept donations and commissions, there’s a certain percentage of your audience that will only contribute to your income if you offer goods. If you’re looking to make money, then it helps to reach them.
The second question, of course, is why you should handle the merchandise production and shipping yourself rather than simply uploading a shirt design to RedBubble and calling it a day. While there are certainly contexts in which easy print-on-demand services like RedBubble or Cafepress are the optimal choice, there are a few good reasons someone might want to merchandise on their own:
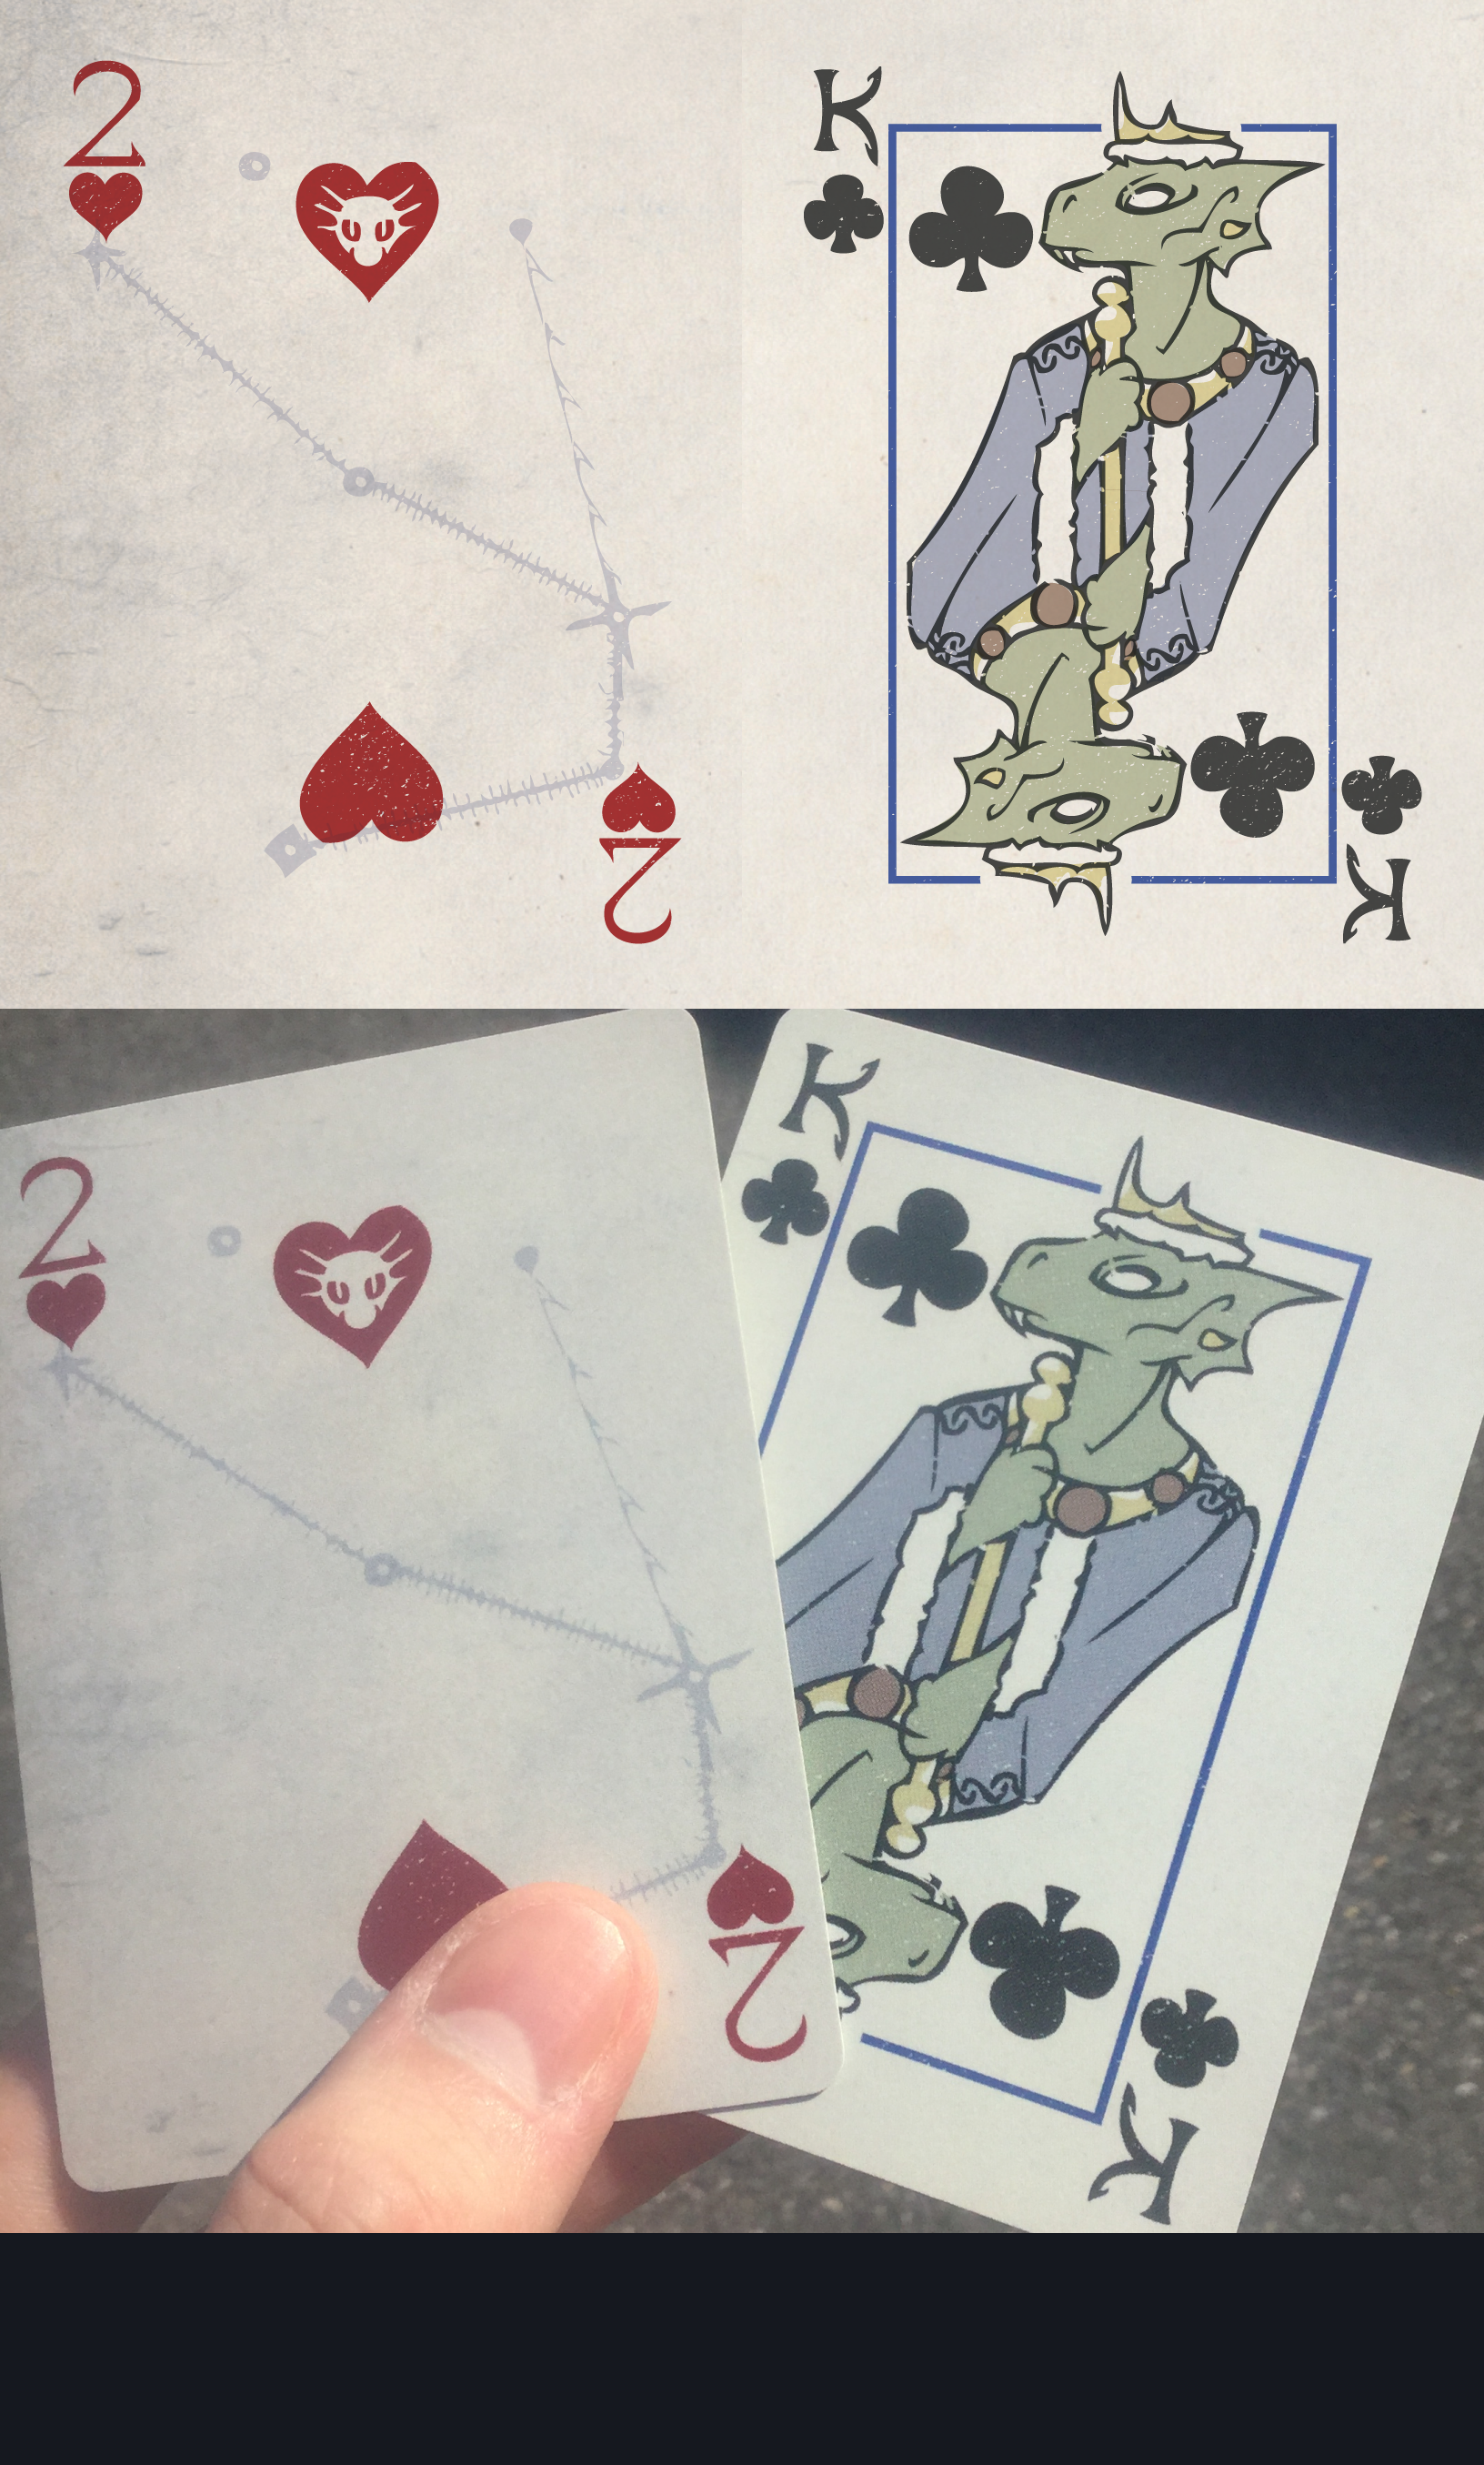
- You want to make something print-on-demand companies can’t do. It might be something high-concept, like my choice to print posters on wrinkle-proof fabric rather than paper, or it might be something more subtle – my aquatic lizard playing cards were actually waterproof, my patches had hidden images embroidered on them in glow-in-the-dark thread, and even my stickers had a translucent shadow under one of the characters. They’re small touches, but they’re things I wouldn’t be able to do through a print-on-demand company.
- You want to make the merchandise more of a “themed experience”. In my case, the larger merchandise packs were shipped in boxes printed to look like treasure chests, the receipt was a mini-comic printed on old-timey laid paper, and the buttons came in a tiny drawstring bag. A Christmas ornament or something from Cafepress is, at best, going to come with a Cafepress ad, but it’s not going to be a fun unboxing that gets people excited about your work. You can’t even throw in little bonuses like a sketch or sticker.
- You or somebody you know needs a job. I’m wording that a very specific way, because I want to emphasize that you aren’t necessarily making more money. While you’ll see a lot more money come in than if you were selling through Cafepress or Redbubble, you’re getting it because you’re taking on jobs that would otherwise be done by a Cafepress or Redbubble employee. You’re going to be organizing, packing, shipping, handling customer service, and many other things – which is probably more fun than whatever shit job you have now, but it’s still a job. Don’t assume it’s free money.
How difficult the work is really depends on the scope of your project. If you’re running some little 1000-reader webcomic where you expect less than 100 orders, this is probably something you could do on the side very easily. Like, invest in some easy-to-produce merch, ship an order off every few days after work, and you’ll be getting a much healthier complement to your ordinary income than you’d be getting from the comic otherwise. When you’re getting into three or four digits worth of orders, though, you’re looking at a full-time job – maybe even requiring more than one person. Speaking from experience, a single person trying to fulfill 1000 orders is miserable! I think it took like five months to get them all out, and four of those months were spent fully convinced I could do it myself and didn’t need help from my friends.
My comic pretty consistently gets around 30,000 uniques a month. The amount of time and resources you invest in your own merchandise will vary based on your own work’s scale. If you’re a small project with a couple hundred readers, you may just want to get a stack of 250 art cards from Vistaprint and sell them for $5 each – meaning you’ll have paid off your initial investment after about five. If you’re scraping the bottom of six digit readership, on the other hand, you’re probably looking at a large endeavor that’ll take at least two other helpers.
Anyway, if you’ve read all that and are thinking self-produced merchandise might be for you, let’s talk about the actual relevant part:
If you need more than 100 of something, you probably shouldn’t try making it at home. I don’t care if you bought a wooden-framed screenprinting kit from Michael’s and the smiling couple on the front makes it look fun and easy. Trying to screenprint 100 T-shirts without professional screenprinting equipment will destroy you.
Luckily, there exists numerous companies who own this equipment and have people trained in using it. These are the companies that make the T-shirts you see in stores and stuff, and their business model revolves around making hundreds of copies of something for artists who will pack it up nice, raise the price 400%, and sell it to consumers. If you’re an ordinary person who has only ever seen the consumer side of things, it can be spooky talking to these mass-production companies that have a primarily corporate clientele and are looking to sell you literally thousands of dollars worth of perfectly identical items. Just remember: they want your money, and they’ll usually be super helpful in hopes that you’ll choose their company instead of a competitor. One company literally took me out and bought me lunch.
The most basic thing to understand about production companies is that the more copies of something you buy, the less it will cost. Sometimes this is just to encourage you to buy more, but in most cases there’s a very practical reason for it. Screenprinting, for example, requires a bunch of work to set up a screen and mix ink, but once that’s done you can print thousands of things for very little effort. Most companies will hide their exact setup costs and instead give you a simple gradient like, “$1000 for 1000 copies, $1500 for 2000 copies, $1700 for 3000 copies”. While you don’t want to overestimate and get more stuff than you can sell, you will save a lot of money if you can estimate the exact quantity you’ll need and order it all at once. Study your audience! I’ve had people accuse me of somehow sacrificing artistic purity by doing “market research”, but this is how you make money as an artist.
Even if you know the exact quantity of something you’ll need, there’s another risk to bear in mind as well: once it’s actually made, the product might not look the way you wanted. As such, you want to prototype whenever possible – getting a few copies of something before ordering a massive quantity. Prototypes are expensive (you might end up paying $200 for a single copy of a comic book!), but investing thousands of dollars without them can be a massive risk. You don’t want to end up with a million copies of Shark-Tooth Bubs.
Some companies are very amenable to prototyping. The company I got my embroidered patches from, Moritz Embroidery, has a setup where a single prototype costs $100, but each prototype you order gives you $100 off if you eventually order patches from their company – meaning the prototypes are essentially free as long as you place an order. With other companies, though, you might have to specifically ask for their prototype pricing. When I first started arena armor T-shirt, I placed a sample order for 24 shirts – the minimum order listed on their website. The initial design ended up being awful – the metallic ink I requested on the sleeve was way too stiff and my plan to make the blue line go all the way around the collar didn’t work out as planned, meaning I ended up with about $300 worth of shirts that weren’t good enough for me to sell. It was only later that I started asking the screenprinting company how much it would cost to get a single copy of designs. It involved paying $60 for a single copy of the shirt, but it let me see the finished product and correct the last few errors much more cheaply than if I had been getting 24 each time (or worse, ordered the full 500 without prototyping).
Depending on your funds, it won’t be viable to prototype everything. My personal advice would be to strive to prototype anything involving fabric, but maybe take chances on things involving paper or vinyl. There are plenty of places where fabric can go wrong – the ink might be too stiff or hot for something wearable, or the fabric’s color might alter the ink’s color too much, or the printing process might just have different outcomes than you expect. When printing on paper, though, a simple PDF proof will generally be representative enough of the final product to stake money on it.
Something else to bear in mind is that you want to be creative when designing things. I just don’t mean creative in the artistic sense, but creative in how you use your resources to make stuff.
To give an example: one of the items I sold was a black T-shirt with an image that used three colors: yellow, blue, and dark blue. Because it used three colors, I opted to use three colors of ink, never once realizing that I could’ve gotten that exact shade of dark blue by halftoning the light blue. If I had realized this, it would have saved me hundreds of dollars, but instead I fell into the flawed mindset that three colors necessitated three inks.
I did a bit better on creativity in other places. The fabric posters, for example, were ordered on 5-foot-wide rolls that I needed to cut apart myself. A 5-foot-wide cutting machine costs almost $1000, but the one I used is made with a $10 shower curtain rod, has a laser guide, and uses two rotary blades spaced 1/4 an inch apart so that a single cut can separate the posters and trim off the bleed area. Feel free to steal the design!
The final consideration you want to bear in mind with production is to always think about weight. It’s easy to forget about this when producing things, but weight is a huge deal. Not only do heavy things cost more to ship to customers, but, if you’re not using a local company, they cost more to receive from your producers. Shipping a 700-pound palette of apparel from Phoenix to Maryland costs close to $300 even if you use a slow and low-cost freight shipping company. A small box full of playing cards feels like a cinderblock, and UPS charges you accordingly. All of this leads to expenses that won’t show up if you merely look at the raw production costs.
If you’ve ever ordered a T-shirt from WeLoveFine, you’ll notice the American Apparel tees they print on are very lightweight and airy. The blank American Apparel shirts cost more than other companies like Gildan or Port&Co, but I’m willing to bet that WeLoveFine actually recoups most of that when it comes to shipping costs – especially international shipping, where you can easily pay up to a dollar per ounce. Consider this stuff carefully when you are deciding what products to make and materials to use – every ounce makes a difference. Even things like the page quantity or paper type on a comic can make hundreds of dollars of difference on shipping costs alone. I got an excellent deal on that old-timey laid paper I printed the comics on, but I didn’t think about the two ounces of weight it would add to every package.
And speaking of packages, let’s tackle that monster:

You know how in some video games, everything is completely easy once you know some small secret? Like, you realize that you can catch the exploding flechettes from Hunter Synths on a log and throw it back at them, and then suddenly all the fights against Hunters are a complete non-issue?
Shipping is like that. The difference between a good and bad price pivots entirely on whether you know the secrets.
Like, there’s this company called Endicia that collaborates with the US postal system and sells postage for less. As in, if you buy postage from Endicia, it costs less than buying postage straight from USPS, even though the US Postal System carriers will be the ones delivering the package either way. Not only that, but first-class packages paid for through Endicia can be up to one pound in weight, whereas first-class packages paid for at the post office have to be under 13 ounces! It’s like if your grocery store had a secret checkout line where everyone was charged half as much as normal.
The one drawback to Endicia is that it’s a little complicated to use, and you’re usually going to be dealing with it through an interface provided by some intermediary company (I used ShippingEasy, which has a $10/month fee if you want the commercial postage prices). If you’re shipping a decent number of packages or only need it for a small period of time (e.g. fulfilling Kickstarter rewards), this is completely worth it. However, if you’re only going to be shipping one thing every week or so, it may be better to design your packages in a way that can ship cheaply even without Endicia.
That leads me to the second thing: package design.
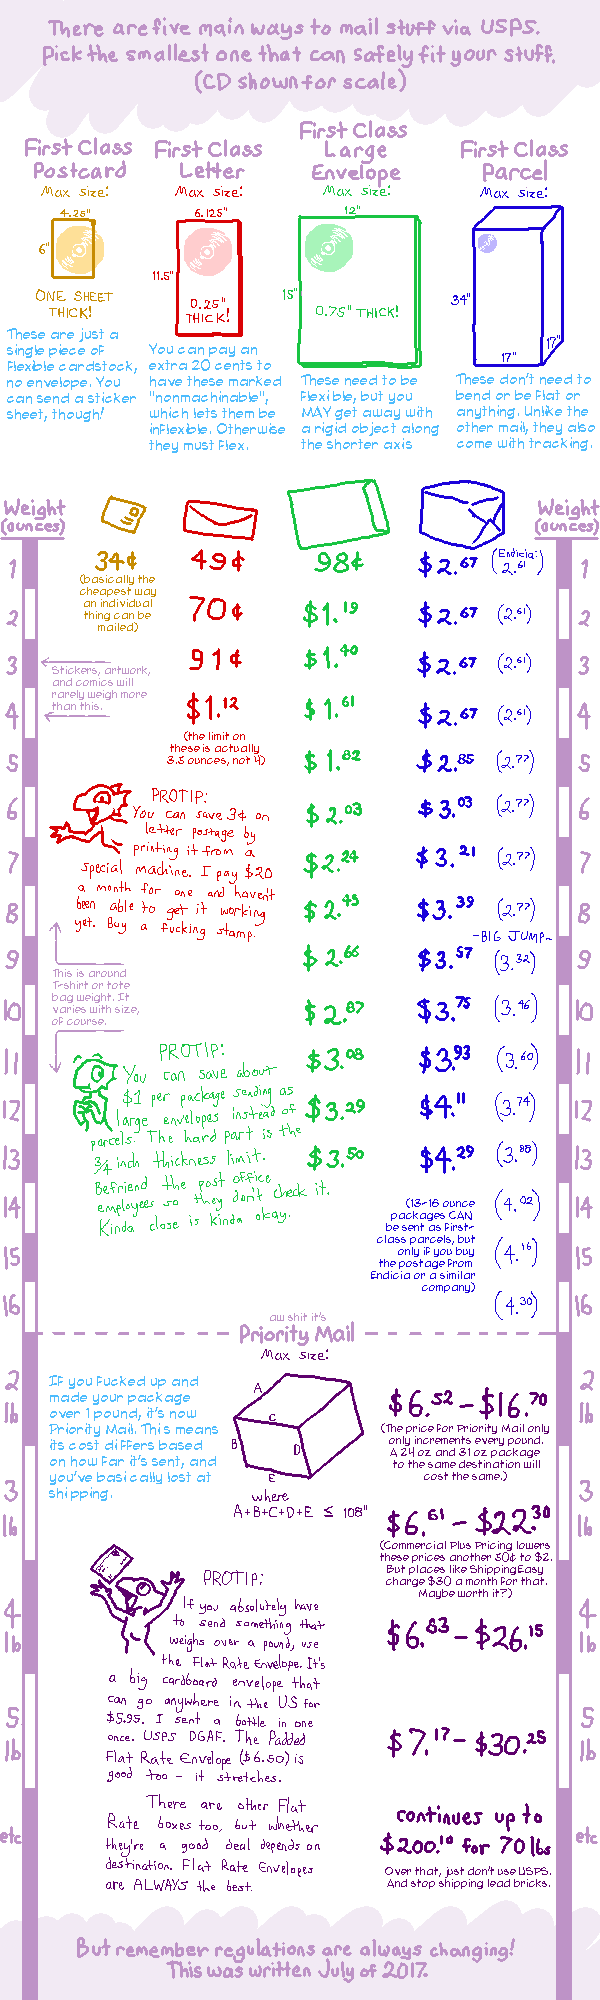
There are several different ways that things can be sent, some cheaper than others. If you can fit something in an envelope, for example, you can mail it for as low as $0.49, while sending it as a package would cost a minimum of $2.61. Two dollars might not seem like a huge difference, but on dozens (or even thousands) of packages it’s going to add up, and the combined effect of many small choices like that will be what vastly increases your revenue. Rather than letting some print-on-demand service print your bumper sticker for $2, ship it as a package, and let you add a $3 markup (meaning your reader pays $7.61 for a bumper sticker and you get $3), you can mass produce higher quality stickers for $.60 each and ship them in envelopes – meaning a reader paying $7.61 for a sticker would net you $6.52. Alternatively, you could keep the markup at $3 and instead sell your stickers to readers for $4.09, which would probably sell a lot more of them.
Much like prototyping the actual products, you will want to prototype your packaging before you sell things. Like, speculate on the cheapest way you can safely pack and ship your product, and then actually see if you can fit one within those size and weight limits. One of the big mistakes I made was assuming I could fit a T-shirt in a large envelope, only to discover that no size other than Small could fit within the 3/4-inch thickness limit (leading to hundreds of dollars of unforeseen costs). I also made the bad choice of sending a bunch of the merch in boxes custom-printed to look like treasure chests, not realizing that I could’ve neatly fit the contents inside flat rate envelopes and saved thousands on shipping. I thought I was paying a couple dollars for the fancy boxes, but using them instead of flat rate envelopes was costing me an extra $2-10 per package.
The rules about the different package sizes and weight limits can be complicated and hard to keep track of. So, here’s a cheatsheet that tells how to do everything perfectly all the time. You’re welcome.
The last thing I want to discuss in this section is international shipping. It’s quite different from shipping domestically, but it’s the same basic premise: if you know the secrets, it’s super cheap.
Endicia doesn’t give a discount on international shipping. Instead, there are companies that take international packages, sort them by country before giving them to USPS, and then charge you about half what USPS would. I don’t know why this model exists, but through a company like APC I can literally send a one-pound package to Ireland for around $11, whereas it would cost me $22.50 to send it at the post office. I live close to an APC shipping depot so I can just drop international packages off there whenever I want; someone who lives further away might have to actually ship the packages to APC. But like… sending it to APC so they can send it internationally is still a better deal than sending through USPS directly. Based on my experience with both methods, it would actually get to the buyer faster too.
APC (as well as other international shipping companies I looked into) have two main ways you can send packages. The most basic one is to send packages via the destination country’s local mail system – meaning they send the package to the UK, whereupon Postman Pat picks it up and drives it to the recipient’s house. The other way is what’s called a “courier service”, which is basically what you see in Prequel: you give the package to a single delivery person who promises to take it the whole way, and then things go wrong and it bounces back to your house a month later. Even when a courier service doesn’t run into problems, it costs more and seems to exactly as long as Postman Pat does (on average: 6-10 days). I’d say the only time you should ever use a courier service is if you’re sending to a country with a notoriously corrupt postal system (in short: everywhere between southern Texas and southern Chile).
Also, sending to Russia is a mess. You can only send via their local mail, and half the packages you send will bounce back to you a month later. The sticker on them just says it “wasn’t claimed”. They always made it the second time, though.
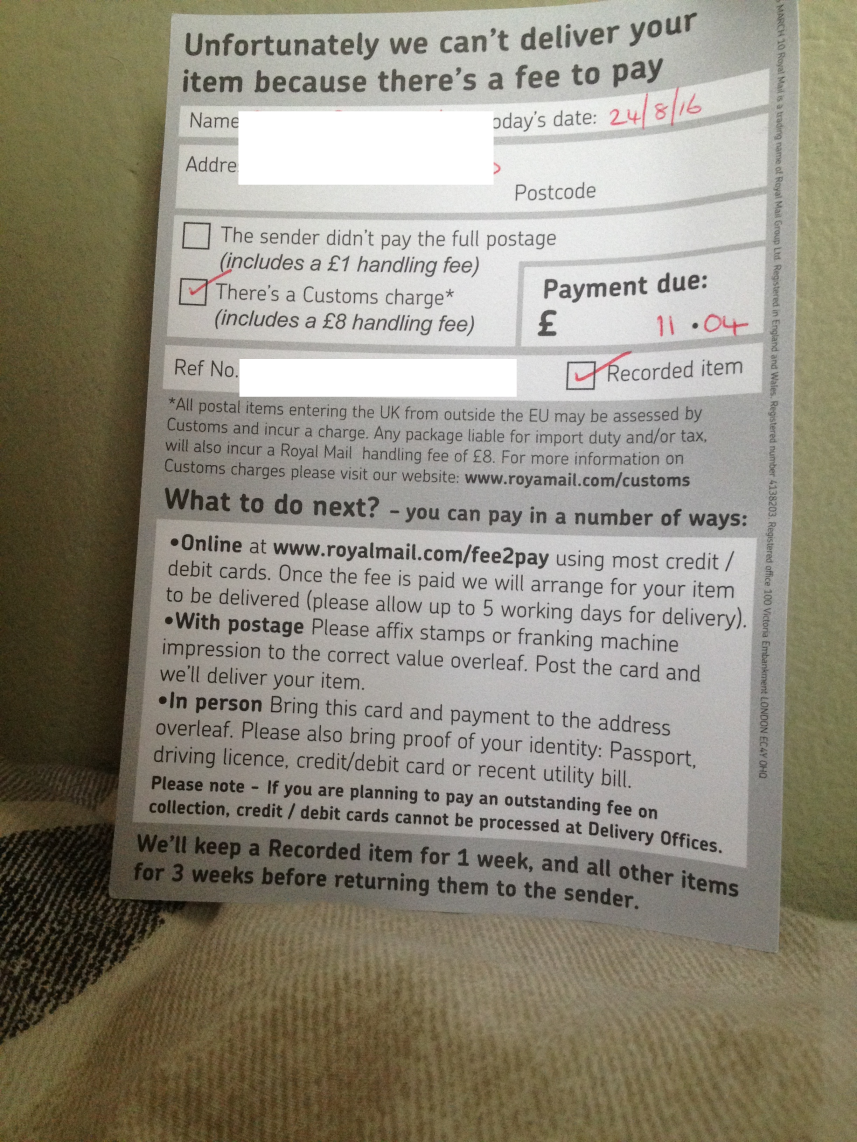
Another consideration when sending internationally is whether you or the recipient is going to be paying import fees or duty. This concept might be new to you if you live in the US, but in most countries when you receive a package from overseas, you need to pay money to claim it and sometimes even open it in front of an inspector to prove you weren’t receiving gold bars when the custom form said “extraneous scrap metal”.
Shipping to some places is easy – in Australia, for example, they have no fees at all on packages under $1000. Most other places, though, set that threshold around $17. After getting some messages from people concerned they may have to pay import fees they couldn’t cover, I went ahead and covered them all. And I’ll be honest: after fully pre-paying the import and duty fees for the 112 international packages with a value high enough to require it, the bill only came out to around $350. Not only that, but I discovered that when the sender pays the import fees, it’s often less than when recipients pay it (the UK, for example, can add an $11 “handling charge” if the recipient has to meet with a postal employee to pay a fee in person. Even if the fee is $2!). Basically, if your shipping company gives you the option to pay the import fees, I would say it is a completely worthwhile investment. If they don’t, just make sure your buyers know that the fee falls on them. Find an international shipping company and establish this ahead of time.
The last thing to note about international shipping is that you can still save money by fitting things in envelopes or large envelopes. A regular one-ounce USPS international envelope stamp costs $1.15, and there’s no real way to make that cheaper. Companies like APC can give a discount on large envelopes though, actually bringing the price down as low as $1.15 – as much as internationally sending a regular 1/4-inch-thick envelope, and only $0.17 more than shipping a large envelope to someone in the US! If your audience is spread out around the world, these little tricks can potentially spell the difference between staying at Wal*Mart or being a professional artist.
Anyway, with the general production and shipping stuff out of the way, I want to talk a bit about the products I made, the costs they had, and the reception they got. The rest of this is basically going to be things to consider when deciding what products to make.
Since this was my first time merchandising, I wanted to do a large variety of products – some “normal” things like shirts and stickers, and some “weirder” things like playing cards and fabric posters. The one thing I wanted to avoid was “corporate level” stuff, like a pen that says “Prequel” on it. The way I see it, good merchandise is designed in such a way that it can still have aesthetic/humorous value to someone who is completely unfamiliar with the source material, and not just be a sponsored version of some cheap and readily available product. This is actually part of the reason I ended up passing on the yoyos, despite having them completely designed.
I was hoping there’d be some great revelation from the product variety, like one thing everyone definitively loved more than everything else, but preferences were actually pretty evenly spread out. There are still a few nuances I can comment on, though, so I want to talk a bit about my experiences with the individual things I made.
(Products presented by the lovely Soldier Of The Imperial Legion)
Let’s start with the small stuff. I got some postcards from VistaPrint, and they were fairly inexpensive to produce. The glossy finish on them adds durability and looks nice art-wise, but it’s on the back as well, which means fresh ink smears very easily. I had exactly one pen that just never dried at all on it.
I made a joke on the Indiegogo page where I described the postcards as “tiny paintings for leprechauns”, but I was actually surprised how many people hung this little postcard up on their wall. Like I mentioned earlier, if you’re looking for an easy merch, I’d honestly just recommend ordering postcards and selling them as artwork. Skip the standard postcard stuff on the back (e.g. address lines, stamp square) and instead put a website address, a nice texture, or something professional like that. A 5×7″ postcard has a fairly nice size and can still be sent in an envelope for $0.49.
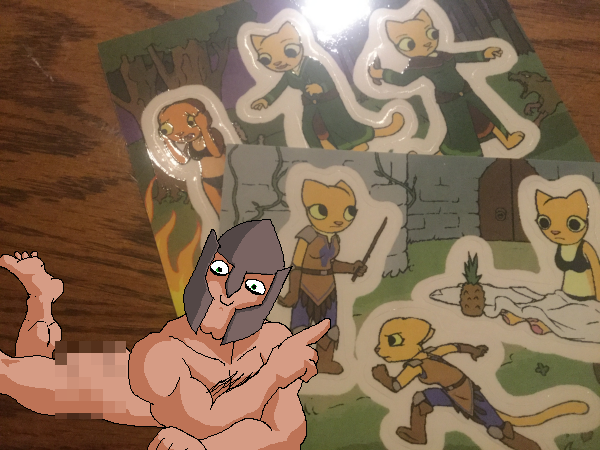
Stickers are another one of those small merchandises I’d highly recommend to people just starting out, since you can produce and ship them for fairly cheap. I got mine from Stickerobot, a company that actually screenprints the stickers rather than using digital printing (meaning the stickers have a nice texture and are basically indestructable). The way it works is that they’ll compile a whole bunch of sticker designs into a single sheet, creating a screen for white, magenta, cyan, yellow, and black, plus a custom metal cutting plate that separates and kisscuts all the stickers. The drawback of this is that it can take a while (since they have to fill a sheet before they print the stickers), and you can only order in increments of 1000 (which basically bars prototyping, and sucks when you need 1099 of them like I did).
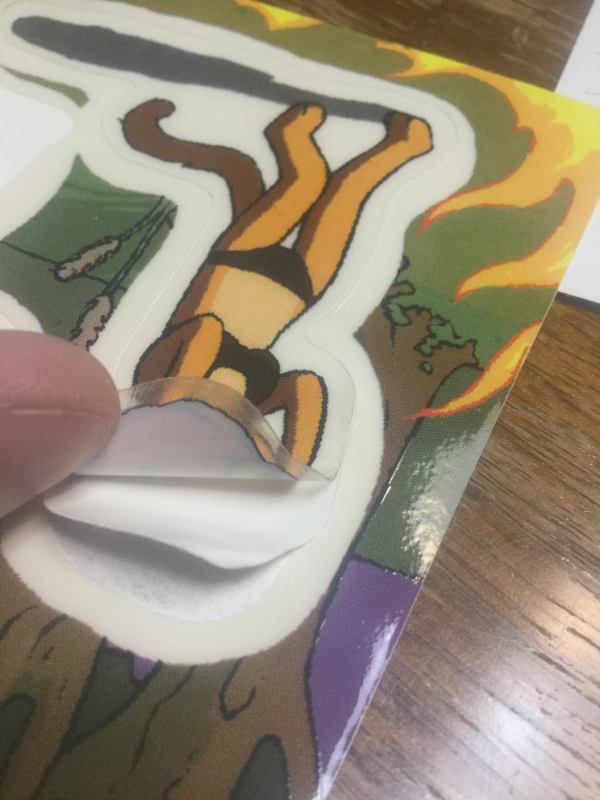
One of the stickers I made had a translucent shadow under the character. This is achieved by printing a color on the sticker without printing the white backing beneath it. Most sticker companies won’t have a way to do this on their website interface, but they’ll still do it if you email them about it (at least, every company I spoke to was willing). The hard part about this is gauging what shade to use for the correct translucency. For reference, here is the shade of gray (printed with no white backing) I used for the shadow, along with how translucent it ended up being:
The only other thing worth noting about the stickers is that sometimes the kisscuts were a bit too deep, causing the layer of paper behind the sticker to peel up instead of the sticker itself. This happened on some of the sheets but not others, and I can’t say with certainty how many of the sticker sheets had this issue, except that it was a minority. The stickers themselves are still perfectly usable, it just takes a little work to separate the thin layer of paper off the back. Just be aware that it is something that may come up when ordering kisscut stickers from Stickerobot, and possibly other places.
Buttons are a pretty simple product you can get from dozens of companies for roughly the same price, or even viably make yourself with a good printer and a professional button press. When designing them, just remember that they curve on the edges. The companies will give you a template that labels the area that wraps around the edge, but the button actually curves a bit before then. To keep things looking professional, you’ll want to keep your art on the flat part – or at least touch the curved part evenly.
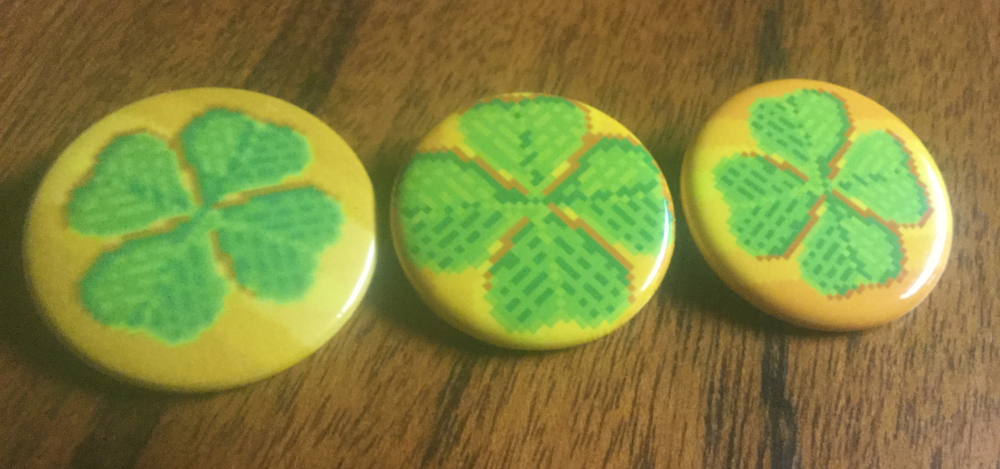
Also, if you’re putting pixel art on buttons, remember to scale it up prior to sending it to the printer. When these companies receive low-resolution artwork, it’s usually little old ladies trying to make buttons for their church group using a thumbnail pulled off Google Images, and the printer may blur the pixelated image a bit to make it slightly less bad. Even if you’re printing it yourself, a lot of software does this automatically, turning pixel art to blurry mush. Play it safe and scale your work up ahead of time, giving the company a version at the proper printing DPI with every pixel beautifully crisp.
To show what I mean, here’s my initial prototype (blurred by scaling), my second prototype (curved over the edges), and my final design, all in a row.
I sent these buttons in little drawstring bags with other merchandise, but something to note is that you actually can mail buttons alone in an ordinary envelope with a nonmachineable surcharge (meaning a total shipping charge of $0.59). I sent buttons out a few times as prizes for minigames, and what I did was use some mini craft sticks and glue to make a “scaffold” that protected the pin mechanism on the back from being crushed. The total package is slightly over the 1/4 inch limit for letters, but it’ll usually make it there anyway. I sent hundreds of these and think I’ve only had, like, three that got shredded by letter sorting machines.
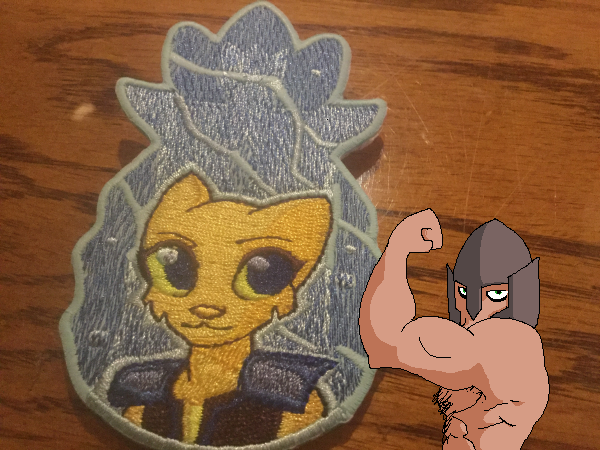
When a friend recommended I sell patches, I had trouble believing the demand would be that high. To my surprise, though, quite a few people were interested: in packs that gave a choice between a patch or stickers, the preference was almost evenly split.
Like I mentioned earlier, I got my patches from a company called Moritz Embroidery that has a lovely system for prototyping. One thing to remember, though, is that there will be slight variances in the printing simply due to the nature of embroidery. I didn’t realize this, and I think I ended up shelving about a quarter of the patches because a line under Katia’s nose printed too thick and looked like a Hitler mustache. Well, I mean, not that much like a Hitler mustache, but similar enough at 10 feet that I didn’t want to sell them. Patches are probably a better idea if your work has some recognizable emblem that will still look okay if a line ends up a little too thick.
When ordering patches, you’ll have the option of giving them iron-on backing, meaning people can stick them onto clothing using an iron. I did not get this on my patches, because ironing them would actually cause the glow-in-the-dark thread to stop glowing. I’ve also been told sewn-on patches last longer than iron-on.
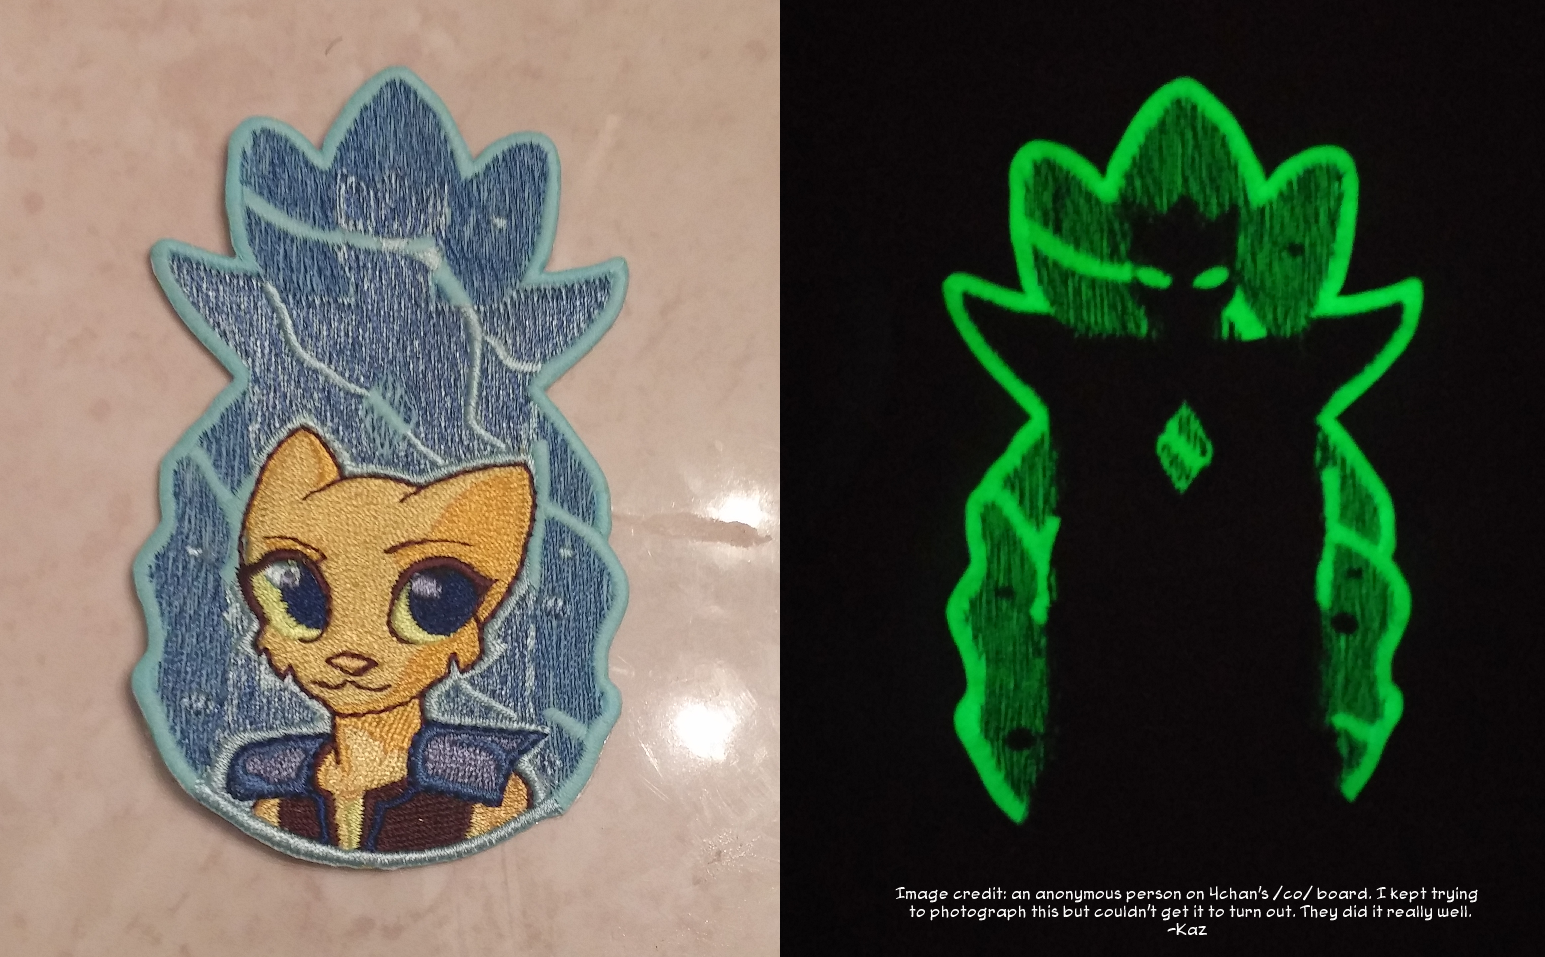
Art cards, stickers, buttons, and patches are all nice little things that you can make a supply of for less than $100, keep stored in a desk drawer, and mail for less than 60 cents. If you’re a small project just starting out, I think these are all very viable options if you want to make some additional income, reward higher-tier Patreon donors, or even just give your audience a way to show off their tastes (maybe even expanding your audience if someone sees the sticker on their laptop and asks “hey, where’s that character from?”). I covered these first because they’re all very economically safe things to experiment with, and if you wanted to try out merchandise you could easily start selling these by the end of the week.
You probably won’t make a living off stickers and buttons, though, so let’s get into the bigger things:
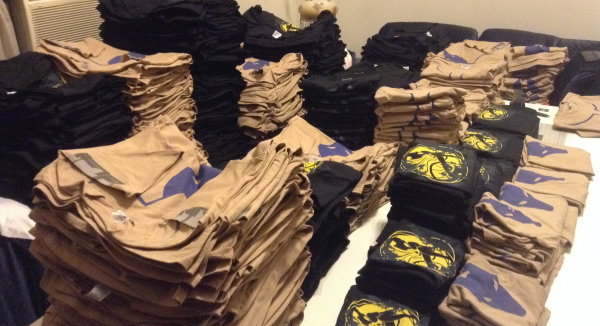
I have very mixed feelings about T-shirts. On one hand, they were one of the best selling items – the single-shirt Apparel Packs were the most-purchased tier on the Indiegogo page, and even in the packs where people could choose several items, everyone but three people wanted at least one T-shirt. On the other hand, T-shirts are extremely annoying to work with, as they take up a bunch of space, weigh a lot for shipping, and you need to stock them in a ton of different sizes. Like, 900 T-shirts divided into eighteen sizes (including women’s and tall) and two designs meant the largest room in my house was the T-shirt room for several months. This definitely isn’t something you could do from a dorm or small apartment – or, if you have to do it, you should at least just produce one design, not two. And just let the tall people wear an XXL and look like sails.
I produced two T-shirt designs because I know there are basically two camps when it comes to apparel: people who want something with centered art of an important character, and people who want something subtle that will be picked up by Fellow Fans but everyone else will just see as a band logo (to use the old online slang term: people who like to “hide their power level”). Personally, I like to design things with a mix between the two, but I tried to create one design that fell on the slightly higher end of the spectrum and one that fell on the slightly lower.
Of the two designs, the black, three-color shirt design by Neko Samba was the more popular (both in that it sold more, and people who received both shirts were two to three times more likely to consider the black one their favorite). At the same time, there were some people who preferred the the arena armor shirt I designed, and some who told me they only purchased a shirt at all because the armor shirt offered a subtle design. When polled on what they wanted to see in future merchandise, about two fifths of responses wanted to see “more Katia” while about one fifth wanted “more subtlety”, so the impression I get is that these are basically two, mutually exclusive audiences when it come to apparel designs.
On a more technical level, the shirts I got were printed on Port & Company bases, which got a mixed-but-mostly-positive response. The general feedback consensus was that people liked the fabric quality, but felt the neck hole was slightly too small. Only four people went on to tell me the size they got didn’t fit, so apparently the dimensions listed on Port&Co’s website are fairly accurate. A few people told me it’s the most comfortable shirt they own, so I think I made an okay choice. The decision wasn’t random – I actually bought a bunch of blank white T-shirts of different brands and wore each one around before concluding Port&Co was the best combination of quality and affordability. If you want to do your own comparison, any local T-shirt printer will have blanks of each brand they can sell you.
The ink used on the shirts was waterbase, meaning the printing changes the color of the fabric rather than being a colored “plate” on top of it. After its first wash the printing takes on the same breathable texture as the fabric around it, and will fade to a “vintage” look over time rather than cracking like plastisol ink. When you’re using waterbase ink you want to make sure you’ve done some sample prints, because the colors will invariably take on some of the background. This is especially important on non-black shirts, where the color you’re printing on it won’t just be darkened, but shifted. On my initial prototypes of the armor shirt, for example, the blue faded to the wrong color when washed. I ended up making a custom ink color that was specifically chosen to become roughly the correct color when mixed with a little beige.
Although I did not take advantage of this, one thing to bear in mind when doing shirts is that you can mix plastisol and waterbase ink in a single design. Something that mostly uses breathable waterbase ink can still involve plastisol ink on parts that need to be vibrant, metallic, or even glow in the dark. If you’re using metallic ink, though, be careful that it’s not that horrible kind where you can rub little sparkles off of it. My original prototype of the arena shirts involved silver armor on the sleeves, but I ditched it when I discovered the silver I picked was that sparkly kind (and discovered that large shapes of plastisol ink on the sleeves makes them far too stiff, and causes them to audibly scrape against walls if you walk too close).
Overall, shirts are a good seller and you can make a lot more off them by selling them yourself, but they take a lot more space, knowledge, and prototyping than everything else. The easiest way to do it is just to come up with a single-color design you can easily get screenprinted. Since it only takes one screen, you’ll be making shirts for maybe $5 and selling them for $15-30.
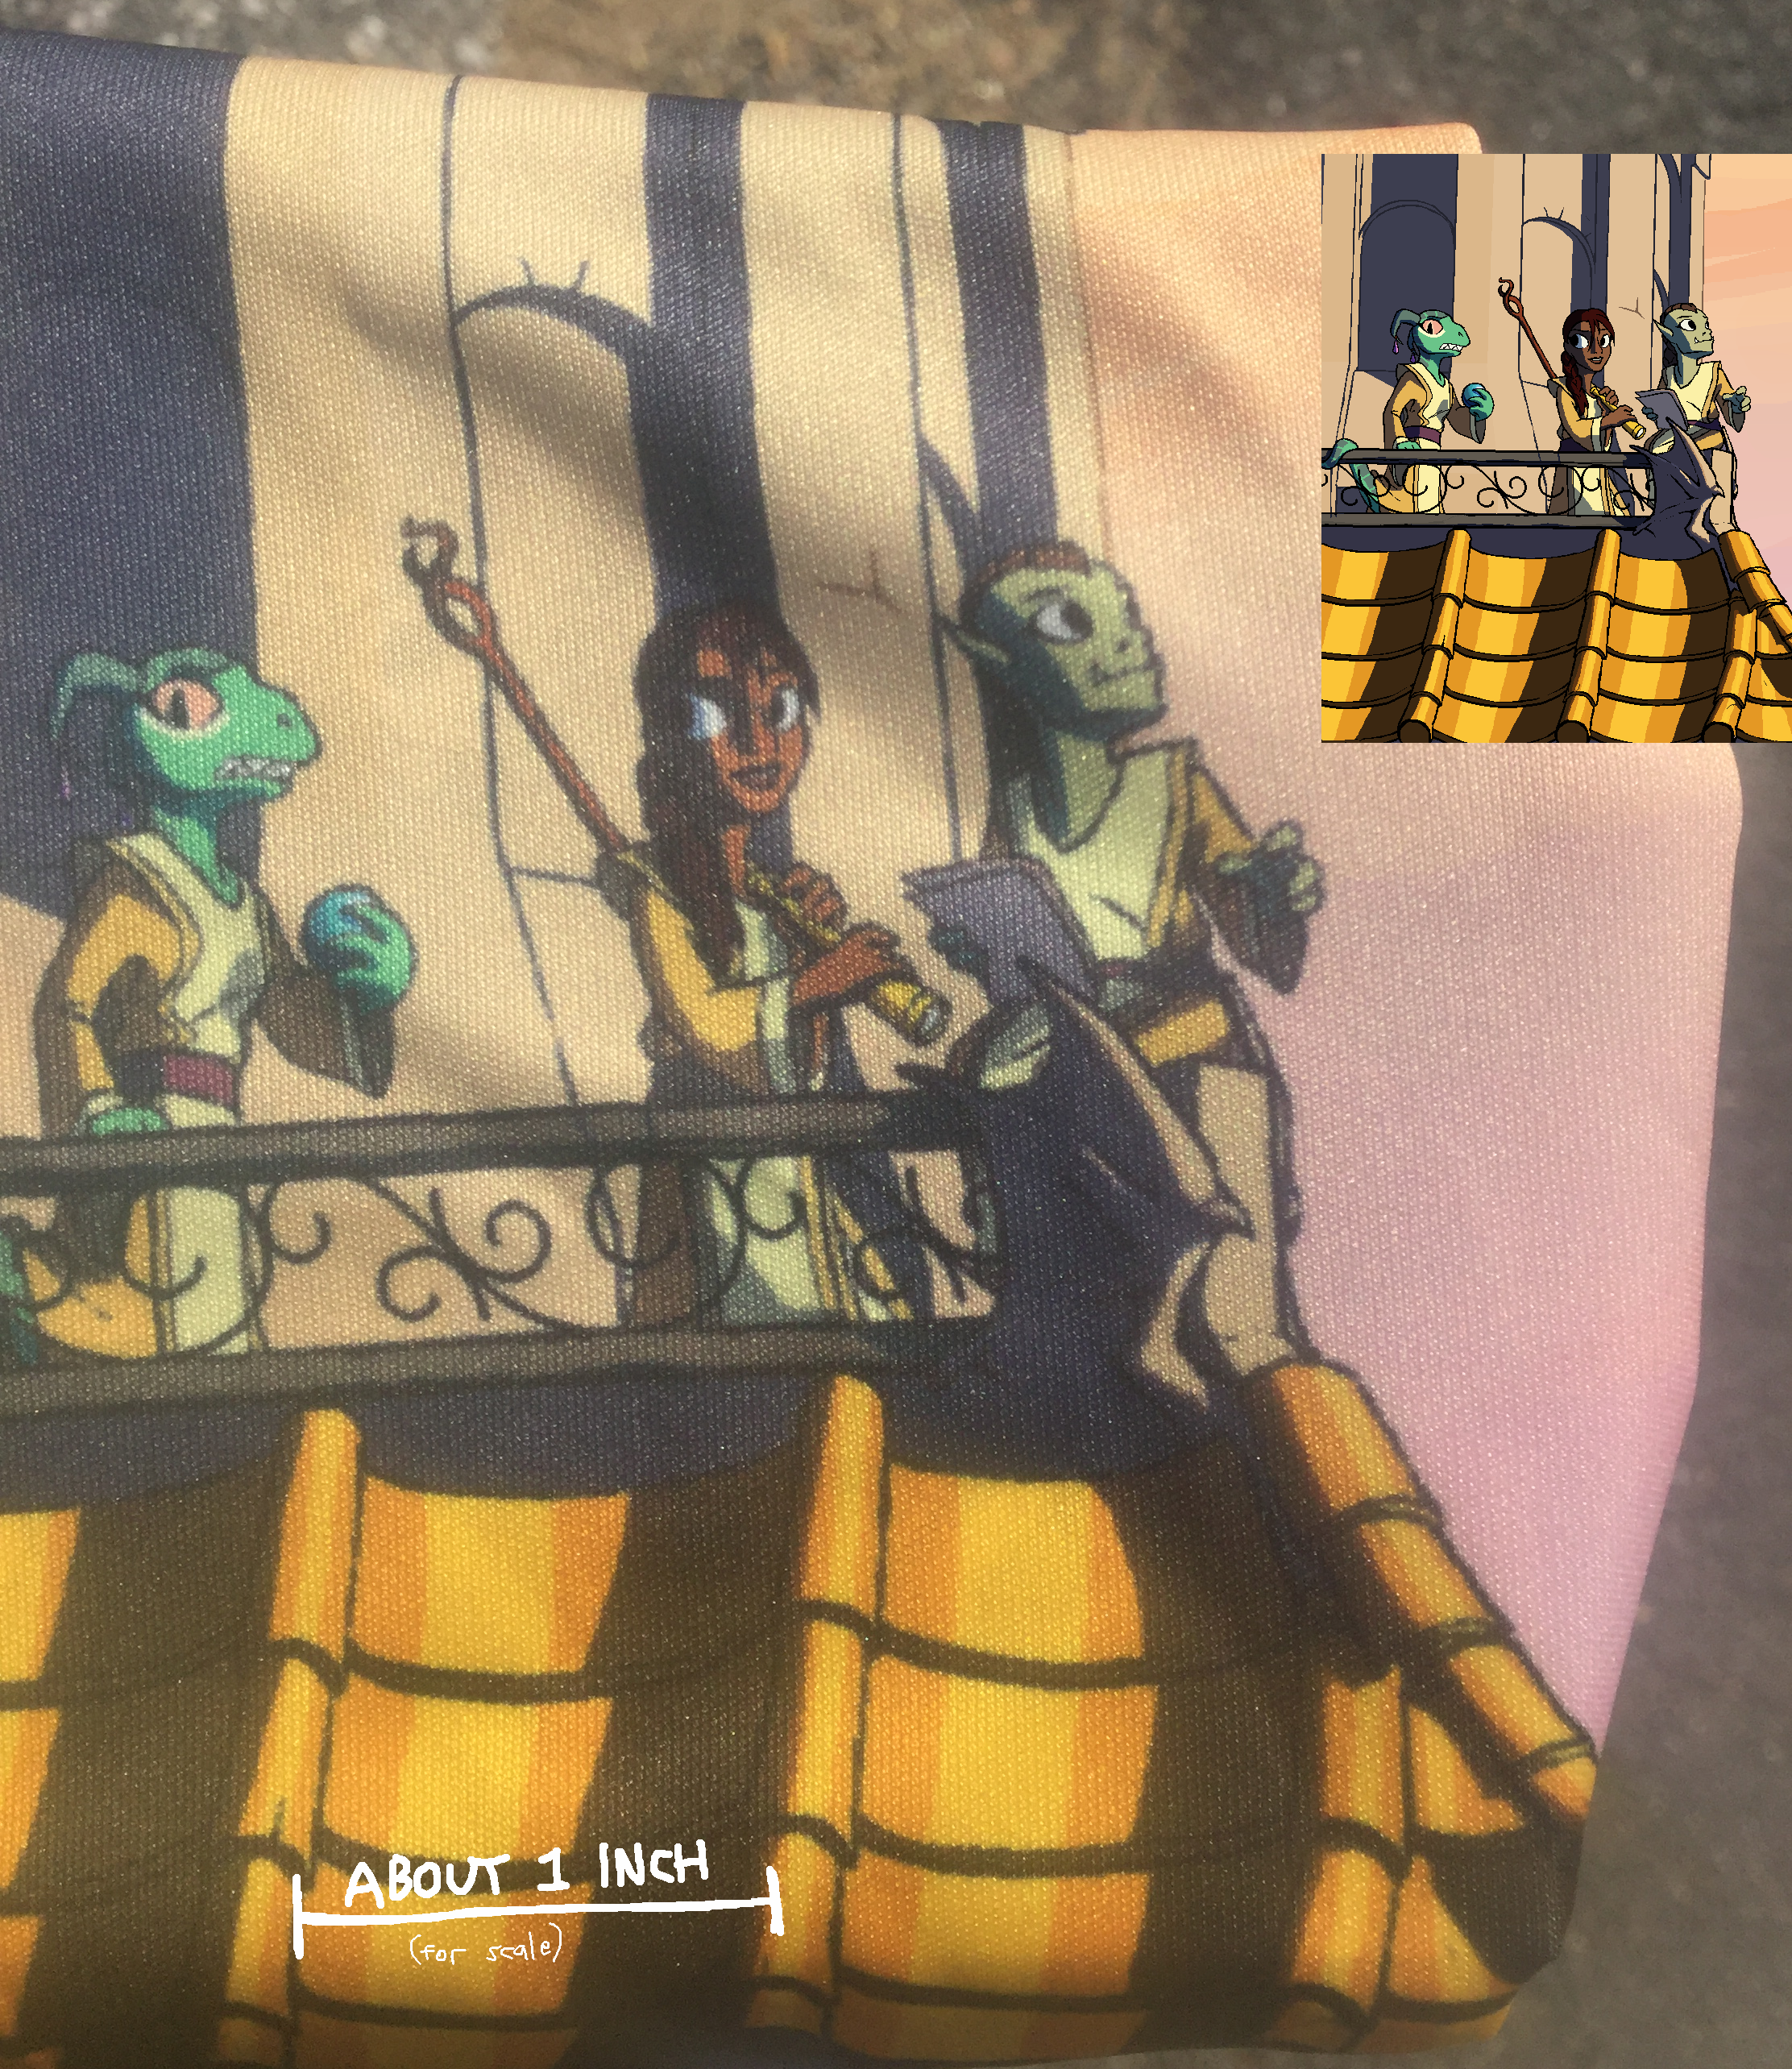
After T-shirts, the second-most-popular item I sold were the “tapestries” – basically just posters printed on fabric. Like the T-shirts, these were both popular sellers and something commonly listed as people’s favorite item in the bunch. The fabric I printed them on came in big rolls that I had to cut apart myself, meaning these involved a lot of manual labor, but unlike shirts I think this is something I’d actually highly recommend more creators try doing.
With posters (or artwork prints in general), you have two major benefits: you only need one size, and they take basically no space to store. When you’re printing them on a wrinkle-proof fabric (I did athletic polyester), you have the additional benefit that you can send them by basically just shoving them into an ordinary envelope. They’re great for meetups and stuff, too – you could literally have a dozen full-size posters in your pocket. This is compared to ordinary paper, where every poster needs to be sent or carried in a cardboard tube to keep from being ripped or bent.
The hard part about making these is that you have to build a cutting machine. I say “build” because an ordinary paper one won’t necessarily do the trick: unlike paper, fabric bends and stretches, meaning you need something with a laser guide so you can align the boundary between two posters along the laser and then run the cutter along it. Like I mentioned in the earlier sections, I also made a cutter that used two circular blades – so none of one poster got on the one next to it. Just make sure you order more posters than you need, because you will mess a couple up when doing this – either because you fuck up a little and cut it crooked, or fuck up a lot and stain it with blood.
When it comes to the actual design, remember that the resolution is a bit lower than printing on paper (Spoonflower, the company I ordered fabric from, does 150 DPI) and that darker colors will both print darker and also bleed a little onto adjacent pixels. A one-pixel black dot on the poster shows up fine, but you can’t make out the three-pixel-tall orc in a gaudy pink dress on the bridge in the background. The deep oranges in the sky just overwhelm him. To give a better idea about the resolution and ink spread, here’s a high-resolution photo of part of the tapestry, plus the same portion of the source file.
The “Unity” tapestry by Cheryl Kerr did not sell as well the extremely detailed cityscape one, but that was basically expected given that she originally drew it for the comic under the directions “make the worst mural”. I think people were more happy that it was being sold than actually wanting it. A few people told me they would’ve liked an option of a pure character art poster of Katia, though I personally opted against that for thematic reasons – I wanted to do something that made the environment look much bigger than her. Still, if discussing what worked/didn’t, an ordinary character art poster was a demand.
And yeah, I offered a nine-foot-wide version of the Unity mural too, for like $300. If you’re thinking “cool, I could make a full-size wall tapestry”, be aware that custom-printing fabric is fairly expensive, and that’s not even counting the time spent cutting, nor the markup so you actually earn something. There’s a reason I was selling those big murals for the prohibitively-high price of $300.
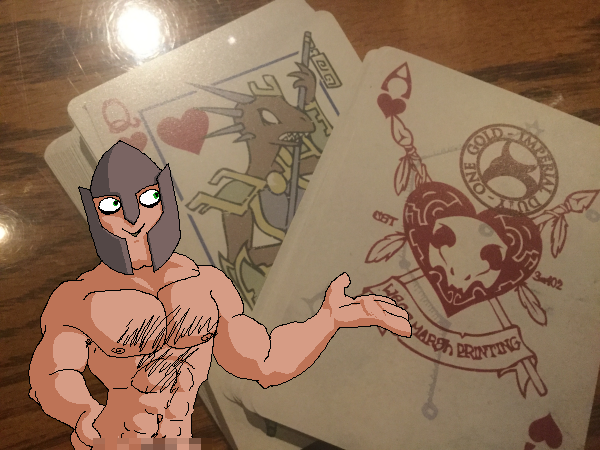
There’s not much to say about the playing cards, because they were actually pretty easy to make. I ordered from MakePlayingCards, and they have a pretty solid interface for uploading and organizing the cards, and plenty of references for how large to make the files, how much bleed area to add, et cetera. They also have no objections to sending you a single copy of the deck, and it’ll only cost about 2-3 times as much as the cards do in a larger order.
Because it was my first time doing card design, I discussed it with some experts for criticism. One important piece of advice I got: if you’re going to give the deck “reversible” backs (as in, looks the same if you flip it upside down), either make sure they are perfectly reversible or don’t make them reversible at all. If people look at the back of the cards in someone’s hand and see very slight differences, many of them will assume the deck is rigged – even if the differences are simply caused by some cards being upside down. Taking this advice, I edited my original card backs to be pixel-perfect reversable.
All in all, the playing cards were very well-received, if a bit expensive to make (but that is largely because I was making them waterproof to match their in-comic iteration). If it’s something that fits the comic/story/game you are merchandising for (or you just want to make some kind of card game), I’d highly recommend it. Heck, if you’re looking to sell some printed artwork with a unique texture, it might even be worth getting a deck of jumbo cards with all the same image and just selling them individually. Just remember, colors are slightly different when printed, and the card texture roughens lines a little, so get a prototype before you get hundreds. Here’s a comparison of the printed cards and their full-rez source image.
Lastly, bear in mind that a deck of playing cards is a fairly thick item – and unlike cloth items, a plastic box or tin will potentially get damaged while shipping if it is not properly padded. I sent the preordered decks in a custom-printed 4x4x4 box, but afterwards I just shipped the remaining ones by throwing them in a 9×12″ padded mailer and rolling the mailer around them a few times before sealing it, creating a little tube of bubble wrap. Both worked fine.
I ordered my tote bags from the same screenprinting company I ordered T-shirts from. They were fairly nice item from a production perspective, since they’re fun to design and you only need to order one size, but they didn’t have the same sort of demand as the T-shirts, posters, and playing cards, nor the same amount of people citing it as their favorite item in the pack. Part of that may have to do with my audience composition, though: among people who listed their gender as “Female” or “Other” in the survey, the tote bag was consistently the second-most-favorited item behind the black T-shirts. Assuming the pattern holds, tote bags would be one of the most popular items for something with fewer male readers. I guess dudes just don’t have the balls to confidently carry a purse.
From a design perspective, something to note is that you won’t necessarily be able to print all the way to the bag’s edge. Screened Gear made some custom boards so they could get closer to the edge, but most tote-bag-printing boards are designed to print a 10×10″ image centered on the bag. Remember, though, that you have two sides you can print on! Also, since it’s not a worn object, you can freely use thicker inks that are potentially less comfortable to wear (like glow-in-the-dark or metallic). There is plenty of room to get creative on these.
Glow-in-the-dark ink is transparent with a slight greenish tint, meaning you need to also print a color underneath it (or build around the fact you have a secret image only clearly visible in the dark). You can get inks that glow in colors other than green, but they’re more expensive and I was warned that they only hold light for a couple minutes. For the tote bags I made, I just printed the ink that glows green overtop a teal base. It’s subtle when not in the dark, and a lot of the people who got the bags probably still haven’t noticed they glow.
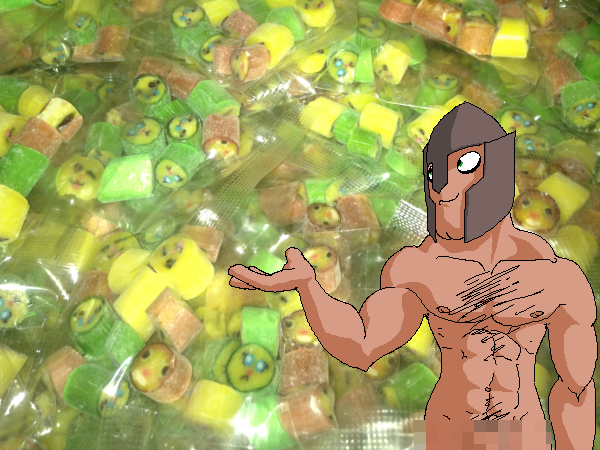
The candy I made was ordered from Sticky Hollywood and was handmade using the method pictured in this video. One ramification of this production process is that the candy was made in batches of several hundred identical pieces, meaning my order of 800 bags was only able to have four different designs. The other ramification is that the candy is handmade and gets heat-distorted through the creation process, meaning the little Katia faces on them ended up derpy and hilarious.
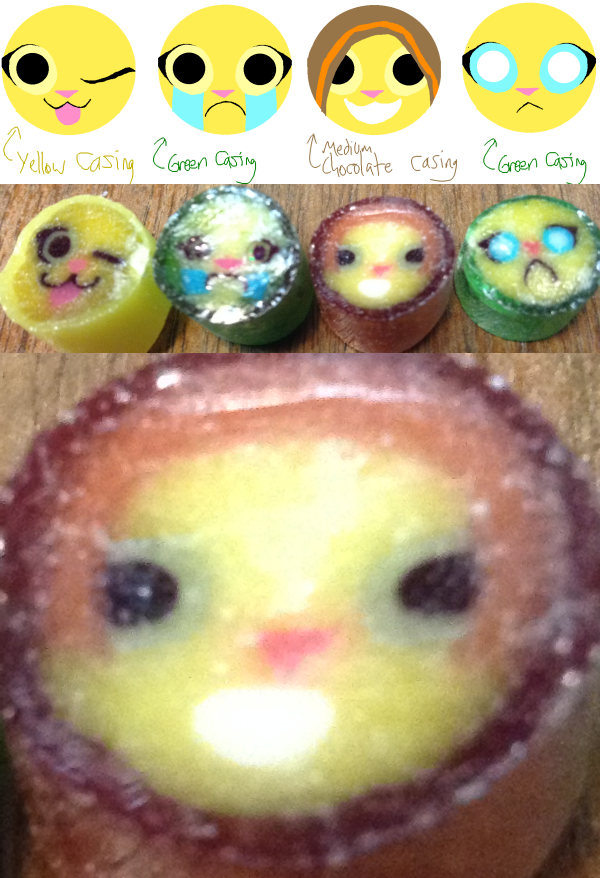
I don’t think this was a bad thing, but some people might. Just know what you’re getting into, I guess.
Overall the reception on the candies was pretty positive, but when you add in the markup and shipping (which has to be a first-class package or better, since an envelope sorting machine would turn them to dust), I think the price gets a bit higher than most people are willing to pay for a consumable item. Unlike everything else here, candy also has the drawback of being perishable, meaning you can’t intentionally over-order with the intent to sell it gradually over the next two years (which was a problem Bittersweet Candy Bowl ran into when they lived up to their name and made actual bittersweet candies). This is probably something best done in crowdfunding or a single burst where you know you can receive it and get it all sent out in a couple months or less.
The receipt comics were the one item I tried making myself, and that was a mistake. While I like the fact that I printed them on the laid paper with a nice and maroon cover and metallic red staples, driving a staple through that many pages is really hard, and my little desktop laser printer was not up to the task of printing 1000 fairly lengthy comics. In the interest of learning from my mistakes, I’ll be honest with you guys: I blew through $900 worth of high-yield printer cartridges before finally biting the bullet and spending $300 on a printer that could load extra-high-yield cartridges. It was horrible.
I think the idea of a comic that changed slightly based on what you purchased was cute, but I don’t know if it was worth it. Like, some of the comics’ iterations were very rare (“treasure chest pack with two tapestries” only occurred three times), so it wouldn’t be viable to outsource something like this to a professional comic printer. Plus, since most people would only ever see one comic, the differences didn’t really matter all that much (beyond looking at the eventual upload and saying “oh, so that’s what people who got the tote bag saw”). Working with collaborators to design a story featuring all the merchandise in variable paths was a lot more fun than actually printing it, but I guess that’s why I do webcomics.
While not exactly a “product”, the final thing I want to talk about is the custom packaging I got.
As mentioned above, the Treasure Chest and higher tiers on the Indiegogo campaign were sent in boxes printed to look like actual wooden chests – a design I commissioned from by Ben Hale. And, like also mentioned above, I could’ve saved a lot of money if I had foregone this in favor of using Flat Rate envelopes, which were perfectly capable of fitting the necessary items. However, I liked the idea of people finding a literal treasure chest on their doorstep, and a lot of people did really like what I did with the boxes (so much that they wanted to keep the box and were disappointed how much shipping damaged it. Whoops!).
I got the boxes printed at Brand In Color. While their prices and service were very good, I’m a bit apprehensive to use them again since they can’t print the bottom of the boxes, and their printing gets utterly destroyed when wet (further compounding the problem of people liking the boxes so much that they wanted to preserve them). If you need to print a mostly-white box with a logo on it or something, I’d still say they’re pretty good.
The biggest problem with custom packaging is simply that it’s not a flat-rate envelope. Overall, if you’re going to do something like this, I think it’s best reserved for packages you know will be under one pound in weight, so they can be sent as regular first-class mail. The Candy Lizard packs from my Indiegogo campaign were like that: cards, candy, stickers, and a folded comic, all packed into a little golden cube that clocked in perfectly at 15 ounces, meaning they could just barely be sent as a first-class parcel.
Self-managed merchandise is definitely worth experimenting with.
The majority of creators have niche audiences too small for significant ad revenue and not particularly interested in donation, and I think offering these audiences some sufficiently creative goods could be the key to these creators quitting their job at Wal*Mart and getting the rewards they deserve. Even if the merchandising takes as much time and effort as the job you leave behind, it’s work that ties into your creative endeavors, letting your income pivot on the successes you have there. It can also be a viable economic route for people who do fanwork and parody: although my comic is based off the Elder Scrolls setting, you might notice the merchandise I sell is notably devoid of direct references. And I mean, you fucks are gonna judge me for my taste in fanfiction, but I would shamelessly buy Austraeoh stuff if it were offered.
Getting started isn’t hard, and you don’t have to be overambitious or put up a large investment. Like, for less than a hundred dollars you can make something simple like a big stack of art cards, which can easily turn into well over a thousand dollars if you sell them all. If you’re confident enough to put up more money, you can try something more ambitious like apparel and maybe make a couple thousand. It’s just a matter of knowing your audience, how big they are, and what sort of demands they have. Also, pricing high enough to turn a profit – a particularly awesome reader who manages a small business stepped in to help me tweak the profit margins, and a good piece of advice I received was to never sell anything for less than twice the production cost.
My hope in sharing my experiences is that you will be able to play the production and shipping in a way that maximizes revenue. “Maximizing revenue” is often seen as a synonym for “making people buy as much as possible”, but frankly, most of the revenue maximization here lies between you, the producers, and the postal system. If someone in Canada gives you $30 for a tote bag, your choices in the production and shipping will determine whether you get a net profit of $2 or $20 from that sale. Your buyer will see no difference, and there is no shame in doing it right.
But like I said, I’m not an expert in this. Take this for what it is: the things I learned in my attempt.